Friday, 12 December 2008

YMCA -Hand in day

As per usual we have had to work to the wire and are watching premiere pro produce error after error in its feeble attempts to thwart our deadline. I will Take this time to evaluate the last 12 weeks.

I still think that I have much to improve with my working to shedule, I am dissapointed at how I shot myself in the foot in the first six weeks by not doing enough work in time. I have improved alot in the second half of the term and I am pleased with the amount that I have learnt in this time. I had little experience in 3D studio max (nil in animation) and although I had done a whole year of max in year two I never felt comfortable enough to explore the program in my own time. This term has been a steap learning curve for me and I am looking forward to the Christmas holidays where I can apply my newly found abilities in modelling and animation to my own projects.


Our group was unfortunate this term with a lot of sickness. I myself was off for a week or so with a cold which I unwittingly passed on to all other members. Amy and Keeley were at a similar if slightly lower skill level than me at the start of this module and I think they have done really well. Keeley however has been very sick in the last few weeks and has missed out on alot of the new things that we have discovered in max. I think she will struggle next semester if she is not able to catch up with all that we have learnt.


Wednesday, 10 December 2008

YMCA - Putting it all together

Me and Paul spent the whole day merging our animated characters into the scenes. fortunatly we did not have to reanimate them every time we merged them in as max has a function from which you can save and load animations.


I wrote a script for the voicover that Paul took back into his grotto of sound recording equipment. Althought I would have liked to be there when it was recorded as I feel that the sound is a very important aspect of the advert. The script is as follows. Each new line for each new scene in the advert:

  • Here at the YMCA we have everything you need for a great night.
  • Chill out with cool people.Dance the night away at our D&B nights.(y club)
  • Join one of our many music groups.(Rock School, get some tips form the staff 7.30pm-9.30pm Every Thursday)
  • Rock out at the Y club
  • Get your own stuff heard at our open mick grime night.(also y ckub) 13-18s welcome at any of our events, come on down!!!

The sound was written to emphasise the sharp transitions. Hopefully with Pauls voice acting genious it will transfigure our humble animation into a near professional advert. Fingers crossed.

Thursday, 4 December 2008

YMCA - Animation

With all the different models and variations in there respective files it is high time we started the animation. We have divided up the animation of the band to start with, Pual will be doing the Singer, Amy the Drummer and I the two guitarists. Unfortunatly Keeley was ill this week and was unnable to partake. Once I had got a grasp of the animation procces I really enjoyed simulating a guitarists movements. I regularly forgot to take 'autokey' off and messed up my animation many times but I am pleased with the outcome.

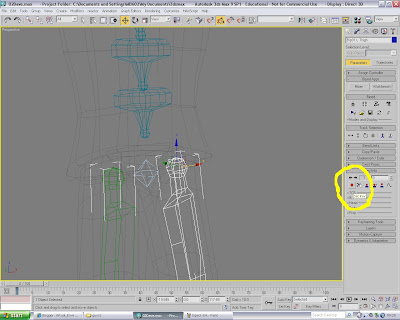
Above is an example of how I animated the character without the rest of the scene getting in the way. When the character was merged into the scene I used the 'selection set' to record the selection so that it could be recalled. Below is (hopefully) a few clips of the animations that I created this week:

Saturday, 29 November 2008

YMCA - Bones, Bipeds and Envalopes

Last year we experimented with the use of bones, we didnt feel like we grasped it fully and consiquently this term we opted to use bipeds. The idea of a fully made skeleton was far too appealing to worry about pros and cons of the two options. It was easy to set up the biped, dragging it to the correct size and proportions and using the "select and link tool" to assign the biped to the body.

We had major problems getting the bipeds in from different files as for some reason max will not allow us to resize them. Paul used bones to create the animation in the lights so unfortuntly neither can be resized. We decided on recreating the rooms and lights as it would ultimatly be less work. We used the merge tool to bring in the bipeds but had to delete the dummys we created as they would not allow the biped to be moved around the scene. Once we had the characters in there starting positions we used the "set key" tool lock them in place as we found that if we did not do this the characters would sporadically jump into different positions.


As we started to animate the characters we found that we were haveing some major envelope issues and arm joints were flying across the scene in all directions. I personally had very little experience before this module in bipeds and general animation so small things like this confused me greatly. After what felt like a long time 'fretting' I was informed that it was a simple fix of changing the parameters.


Tuesday, 25 November 2008

YMCA - Hair and Clothes

We now have male and female characters, however, both are bald and wearing the same clothes. I have spent the week changing colours and creating hair for the characters. I particularly enjoyed this process more than any other that I have undertaken so far this term. I think that I have an eye for aesthetics and really loved making the different hairstyles (maybe I should have been a hairdresser). I went about creating the hair by very simply extruding the polygons off the top of the head and welding them together. This created some depth to the hair and I then extruded as apropriate from there on in. A few examples of this can be seen below.


Here are some examples of the variation that we created for the different characters.


Wednesday, 19 November 2008

YMCA - Head Creation

Its come to the time when I need to stick a head on bodies that I created. As a group we had in mind to use the heads we created in the 1st half of this semester but this brings up its own problems. The bodies have been made too look cartoon like whereas the head was created to look as photorealistic as possible. another problem with using them is that there are only four head in our group and possibly 30+ characters. For this we would need a way to create faces that look both generic and not over complex. To YouTube!

Instead of using the lengthy tutorials created by eric malowski in the first portion of the term we were lucky enough to find many on head creation that take a fraction of the time to follow. Although we do not intend to follow the tutorial click for click it is important to stay close enough as to not be thwarted by any problems that we would invariably come across.

This tutorial we found particularly useful:
http://uk.youtube.com/watch?v=Yr4liDcdVA0

We used the head that Paul created as he finished first and it generally looked better. The Following Images are pauls, not mine. They show the creation process of the head that we used.


With the polygon selection we deleted one half of the box and used a symmetry modifier.


There was another issue that had been rumbling in the background up until now that we tackled earlier this week. The props and room were being created with 3Dmax materialing and looked real. I could see that as soon as the characters where placed into the scene they would look out of place and stick out. I brought this up to the group and it was dicided that a new material (suggested by Paul) would be used on the characters and the props.

Creating this material was quite simple as Paul had already used it in a previous max experiment and simply had to copy the settings across. Instead of the line on the graph flowing from colour to colour it will break them down into blocks creating the effect of shading. With this effect asigned to every colour it will give a consistent cartoon feel to the animation and I think a general air of professionalism.

Thursday, 13 November 2008

YMCA - Character Modelling

Character Modelling!

Fortunatly I managed to find a very helpful tutorial on character modelling that has set me off in the right direction. Unfortunatly it only covers the early stages of the modelling process so I will have to use what I have learned to create the rest. A true test of knowledge retention. It didnt take long before I had the torso of a man infront of me all be it very low poly it was looking pretty good. It was created out of a box, symmetry modified and the reshaped and extruded where appropriate. I hope to create the head in a similar fashion with help of another tutorial.


As a group we are still deciding whether to use our own heads created in the first six weeks of this module. I am leaning toward creating our own but this obviously creates alot more work which some of the group seem against. My main concern is that the heads the we created are an attempt at photo-realism and I think this will look out of place in the style of advert we are making. I sense a storm on the horizon.

A link to said tutorial:
http://uk.youtube.com/watch?v=1NWHUOvo69w